 4.8 | 310 reviews


 972-492-5369
Most manufacturers recommend flushing a water heater once a year to clear out sediment, maintain efficiency, and help the unit last longer. The process differs depending on whether you have a tank water heater or a tankless model.
Both types of heaters do the same basic job, heating water on demand or storing it until you need it, but maintenance looks different for each type. A tank water heater collects sediment on the bottom, where it can’t drain out on its own. A tankless unit doesn’t store water, but the heat exchanger becomes encrusted with sediment over time.
This water heater flush guide explains steps to maintain both types of appliances. Refer to whichever section matches the water heater in your home.
Why Flush a Water Heater?
Water carries minerals, and over time those minerals settle out and collect at the bottom of a tank, or inside the heat exchanger of a tankless unit. This layer of sediment buildup gets worse the longer it sits, especially with the hard water common across North Texas.
In a tank unit, sediment settles at the bottom of the tank, which is right where the heat source does its work, whether that’s a gas burner heating the tank from underneath or an electric heating element mounted inside the tank. In a tankless unit, the minerals coat the inside of the narrow tubes of the heat exchanger, gradually narrowing the space water has to pass through. Either way, the water heater ends up working harder to do the same job it used to do with ease.
Mineral buildup in a hot water heater causes these problems:
- Reduced efficiency and higher energy bills. Sediment acts like insulation between the burner or heating element and the water, so the unit has to work harder.
- Popping or rumbling noises. This happens when trapped water heats up underneath hardened sediment at the bottom of the tank.
- A shorter lifespan for the unit. Sediment speeds up wear and corrosion inside the tank.
- Weaker hot water output or uneven temperatures. A buildup layer makes it harder for the unit to heat water evenly.
Learning how to flush a water heater pays off in lower energy bills, quieter operation, and a unit that lasts longer.
How Often Should You Flush a Water Heater?
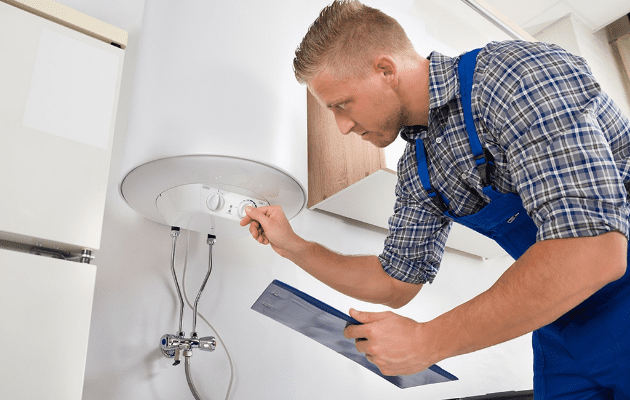
The most common question homeowners ask is “How often should you flush your water heater?” The answer is straightforward: plan to flush a water heater once a year for most homes. If your water is on the harder side, which describes the Little Elm area and much of North Texas, flushing every six months keeps sediment from building up as fast and helps the unit keep performing the way it should.
How to Flush a Tank Water Heater (Step-by-Step)
Draining a tank water heater is a fairly straightforward job if you take it one step at a time.
Before you start, let the water cool for at least an hour, since water straight from a heater can scald skin in seconds. Locate your main water shut-off ahead of time, in case a drain valve or hose connection leaks unexpectedly.
Tools You’ll Need (Tank Water Heater)
- Garden hose
- Adjustable wrench (if the drain valve needs one)
- Bucket, optional, for smaller top-offs
Steps to Flush a Tank Water Heater
- Turn off the power (electric units) or set the gas valve to “pilot” or off (gas units).
- Turn off the cold water supply valve feeding into the tank.
- Connect a garden hose to the drain valve and run it to a floor drain or outside.
- Open a hot water tap somewhere in the house. This relieves pressure and lets air into the tank so it can drain.
- Open the drain valve and let the tank empty completely.
- Turn the cold water supply back on briefly to stir up any leftover sediment, then drain the tank again.
- Close the drain valve, disconnect the hose, and turn the cold water supply back on fully.
- Once the tank is full and water flows steadily from the open hot tap, turn the power or gas back on.
The stir-and-drain step in the middle matters more than you might think it would. A single drain cycle empties the tank, but it doesn’t always dislodge sediment that’s packed down near the drain valve. Running fresh water in and draining a second time knocks loose what the first pass left behind.
While the tank is drained, it’s also a good time to test the T&P valve (temperature and pressure relief valve). Lift the lever briefly, make sure water flows out, then let go and confirm it closes off cleanly. This valve is a key safety feature, and checking it while you already have the area set up for drainage is a quick way to knock out two maintenance tasks at once.
How to Flush a Tankless Water Heater (Step-by-Step)
Flushing a tankless water heater works differently than draining a tank. A tankless unit doesn’t hold standing water, so there’s nothing to drain. Instead, you circulate a descaling solution through the heat exchanger to break down mineral scale.
Before you start, wear gloves and eye protection when handling vinegar or a descaling solution, and make sure the area around the unit has good airflow, opening a window or running a fan if possible, since the solution will be circulating in an open bucket for close to an hour. Locate your main water shut-off ahead of time, in case a hose or valve connection leaks unexpectedly.
Tools You’ll Need (Tankless Water Heater)
- Tankless flush kit (hoses and valves)
- Submersible pump
- White vinegar, typically 2 to 4 gallons, or a manufacturer-approved descaling solution
Steps to Flush a Tankless Water Heater
- Turn off the power and shut off the gas or electric supply to the unit.
- Close the cold water inlet valve and the hot water outlet valve.
- Connect hoses from the service valves (small side ports on the isolation valves, used just for this kind of maintenance) to a submersible pump and a bucket filled with white vinegar, or a manufacturer-approved descaling solution.
- Open the service valves and run the pump to send the vinegar through the unit in a loop for 45 minutes to an hour.
- Turn off the pump and lift it out of the vinegar bucket, leaving the hoses connected to the service valves. Empty and rinse out the bucket, refill it with clean water, and place the pump back in. Run the pump again for 5 to 10 minutes to circulate fresh water through the unit and rinse out any remaining vinegar.
- Turn off the pump, disconnect the hoses from the service valves, and fully reopen the cold water inlet and hot water outlet valves. Restore power and check every connection for leaks before closing things back up.
The full 45 minutes to an hour of circulation isn’t a suggestion you can shorten to save time. Vinegar needs sustained contact with the buildup inside the heat exchanger to dissolve it, and cutting the cycle short likely leaves scale behind to add to the buildup the next flush must tackle.
Tank vs. Tankless Flushing: Quick Comparison
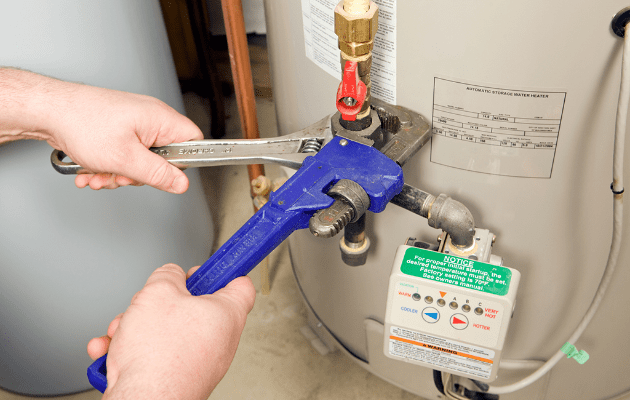
The table below contrasts the two different water heater flushing processes side by side. This can be useful if you’re considering switching your water heater type and want to know how the new maintenance routine compares.
| Tank Water Heater | Tankless Water Heater | |
|---|---|---|
| What You Need | Garden hose, adjustable wrench, bucket (optional) | Flush kit, submersible pump, 2–4 gallons of white vinegar or descaling solution |
| Steps Involved | Shut off power/gas and cold supply, drain the tank through a hose, refill, restore power | Shut off power/gas and supply valves, circulate vinegar through the unit, flush with fresh water, restore power |
| Time Required | 1 to 2 hours, depending on tank size | 60–90 minutes (45–60 minutes of circulation, plus flush time) |
| How Often | Every 12 months, more often with hard water | Every 12 months, though manufacturers often suggest more frequent flushing in hard-water areas like North Texas |
Common Mistakes to Avoid
Most flushing problems come down to rushing a step or skipping it altogether. Here are the mistakes that cause the most trouble:
- Skipping the cool-down period. Draining hot water right away is one of the fastest ways to get scalded, and it’s the easiest mistake to avoid.
- Forgetting to turn the cold supply back on before restoring power. On electric units, running the heating elements without water around them can burn them out fast, sometimes within seconds.
- Using the wrong descaling solution on a tankless unit. Some household cleaners and stronger acids can damage internal seals and components. Stick to white vinegar or a solution the manufacturer approves.
- Ignoring manufacturer-specific instructions. Steps can vary by brand, especially for tankless units, so check your owner’s manual before you start.
Taking the time to do this correctly protects the investment you’ve made in your home’s water heater, whatever type you have.
When to Call a Plumber Instead
DIY flushing works fine for most homes, but a few situations call for having a licensed plumber take care of it instead:
- The drain valve is corroded or stuck and won’t budge, which can turn a simple flush into a bigger repair.
- The unit is older and has never been flushed before, which raises the odds that years of hardened sediment cause complications during the drain.
- You’re not confident handling the gas line safely, since a mistake there carries more risk than a plumbing mistake alone.
- You’d rather set up an annual maintenance plan than remember to tackle the job yourself every year.
Jennings Plumbing Services is family-owned and local to Little Elm, backed by more than 34 years of hands-on plumbing experience. We’ll give you an honest read on your water heater’s condition and a clear price before any work starts, with no upselling and no pressure. If a flush turns up a bigger issue, like a valve that won’t seal or a tank nearing the end of its life, we’ll discuss it with you up front, along with the options you have for fixing it.
How to Flush a Water Heater: FAQ
How often should you flush a water heater?
Most manufacturers recommend flushing a water heater once a year. Homes with hard water often benefit from flushing every six months instead.
What happens if you never flush your water heater?
Sediment keeps building up at the bottom of the tank or inside a tankless heat exchanger, which lowers efficiency, shortens the unit’s lifespan, and can cause popping noises or uneven hot water.
Can I flush my water heater myself?
Yes, in most cases. A tank flush just needs a garden hose and a couple of basic tools, while a tankless flush requires a pump, hoses, and a vinegar or descaling solution. Neither one calls for specialized equipment beyond what you can pick up at a hardware store.
How long does it take to flush a water heater?
A tank water heater usually takes 1 to 2 hours, depending on the size of the tank. A tankless unit generally takes 60 to 90 minutes once you count the circulation time.
Is flushing a tankless water heater different from a tank water heater?
Yes. A tank is drained directly through a hose, while a tankless unit is flushed by circulating vinegar or a descaling solution through the heat exchanger with a pump.
Should the power or gas be off before flushing?
Yes, always. Turn off the gas control valve or breaker before you start, and don’t turn it back on until the tank is full or the tankless unit’s water supply is fully restored.
Contact Jennings Plumbing Services for Peak Water Heater Performance
Whether you have a tank or a tankless water heater, keeping up with maintenance is a smart habit that protects it. Learning how to flush hot water heater tanks is straightforward, and the tankless water heater flush process just takes a different set of steps.
Whether you handle it yourself or hand it off to a professional, the payoff is the same: lower energy bills and fewer surprises. If you’d rather leave the water heater flush to a professional, send our team a message and we’ll take care of it, along with any other plumbing questions that come up along the way.


